How to Use Funny Photo Maker and Edit Photo For Free
Instead of spending time and money on learning PhotoShop then spinning around the countless buttons, you can use Funny Photo Maker to edit your own photos for free yet achieve fabulous photo effects you want. Funny Photo Maker is supper easy to use requiring no graphic editing knowledge. Here we show you how to use Funny Photo Maker and edit photo with gorgeous effects for free. Interesting in photo face fun? You can have a glimpse of How to Edit Face Fun Photo For Free.
Get Prepared!
Editing photos can be a simple task that requires not much things. To get prepared, all you need are just as below:
- File Size: 43.5 MB
- Version: 2.01
- 100% Free
Let's Start The Two-Step Photo Editing!
Every common users are able to edit their own photos within seconds. Using Funny Photo Maker, you can simplify the complicated photo editing task into clicks and turn it into art work of great fun! Funny Photo Maker breaks down the whole photo editing process into 2 steps: Design & Output.
1 Design
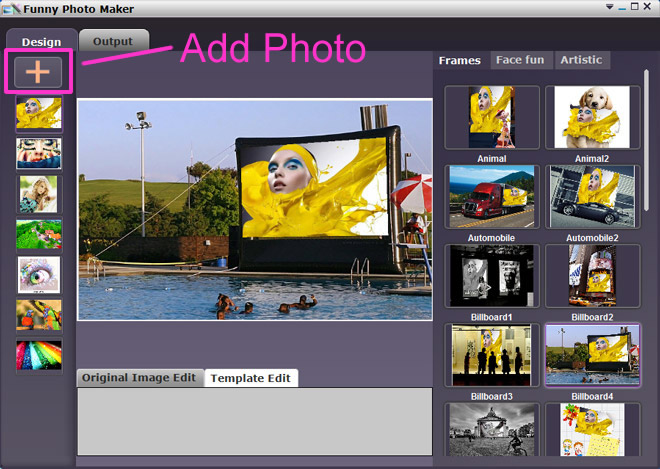
Add photo: You can load your own photo by clicking on the "+" button, then the loaded photo will appear on the left under the "+". If you have already loaded some photos in the program, just double click on photo to apply.
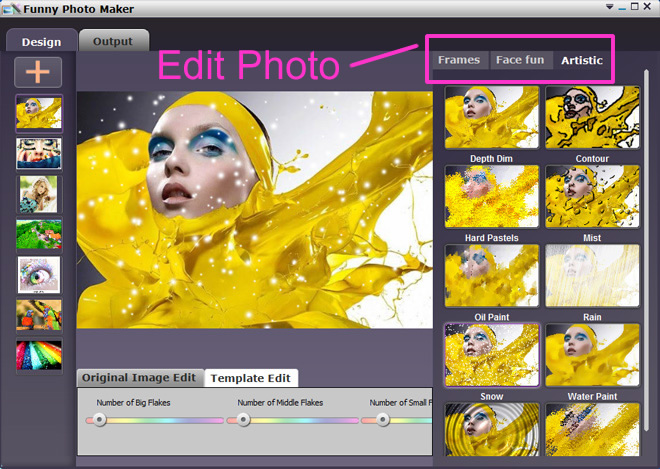
Edit photo: On the right of the Design panel, there are photo effects that available in Funny Photo Maker. Currently, all effects are sorted into three categories: Frames, Face fun & Artistic, offering various choices for photo frame decoration, humorous photo creation and graphic effect process. You can click tabs to switch between then apply preferred effect. Besides, there are also options for customizing which will vary according to specific function.
2 Output
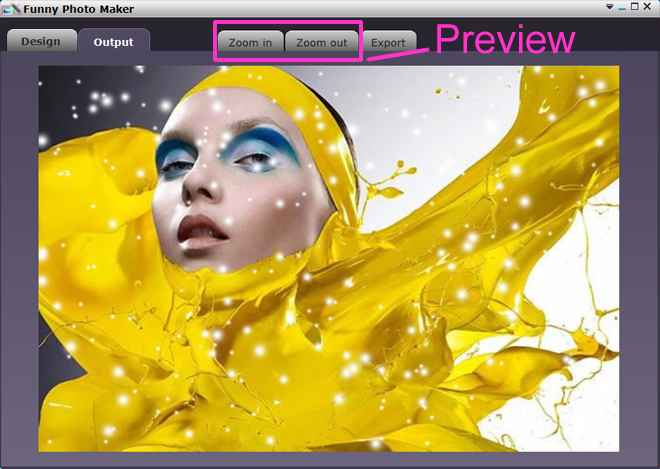
Preview Photo:After editing, please click to Output tab where there will present a preview panel. You can zoom in and zoom out to preview photos.
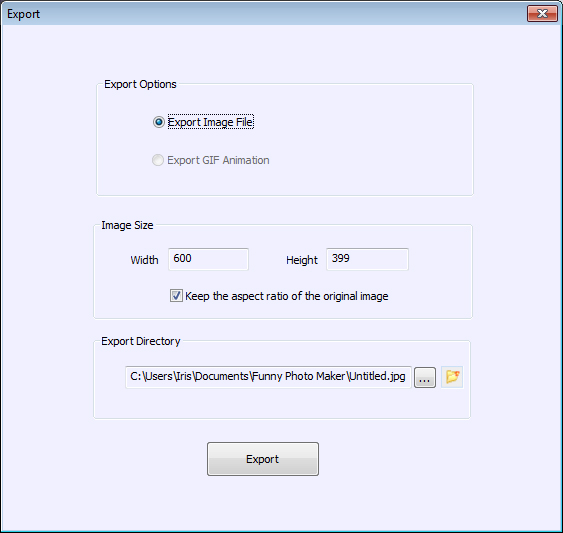
Export File: If you feel the edited photo is ready for export, please click to "Export" tab which will prompt a window for customizing the output file. Here, you can decide your output file type, image size and define export directory, then click "export" button to get output file.
 Windows 7/ XP/ Vista;