How to Add Rain to a Photo with Funny Photo Maker
Taking photos on a rainy day would easily get you and your camera wet, so most of us would change the date if it is raining when taking photographs. But what if the photos must be taken on a rainy day? Will you still busy taking your photos, and let yourself and even your dear camera get wet? In fact, getting a photo taken on a rainy day doesn't not need to get yourself wet at all if you know how to use photo editors to add the rain photo effects to your photos.
When we mention photo editor, most people would first think we mean PhotoShop. But, PhotoShop needs too much time to learn its skills, and we do not know how to use it to add rain photo effects too. So, here the photo editor we mean is an extremely easy-to-use photo tool. Its name is Funny Photo Maker. With this free photo editor, you can wait till it stops raining, take the picture, then add the rain photo effects.
>> Free download the free photo editor Funny Photo Maker
Here’s the photo we’ll be working with for the rain photo effect:
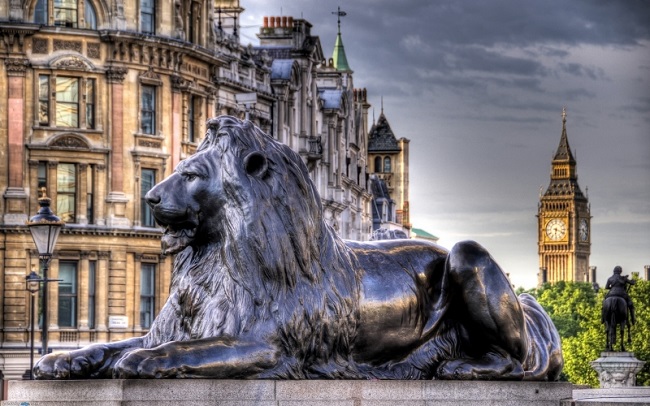
The original photo.
And here’s the same image after adding the rain photo effect with Funny Photo Maker. It’s really coming down out there!
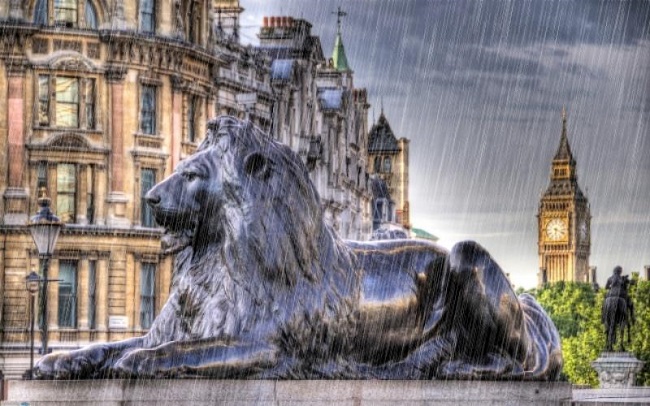
The final rain photo effect.
Let’s get started!
Step 1. Import the photo which you want to add rain photo effect to
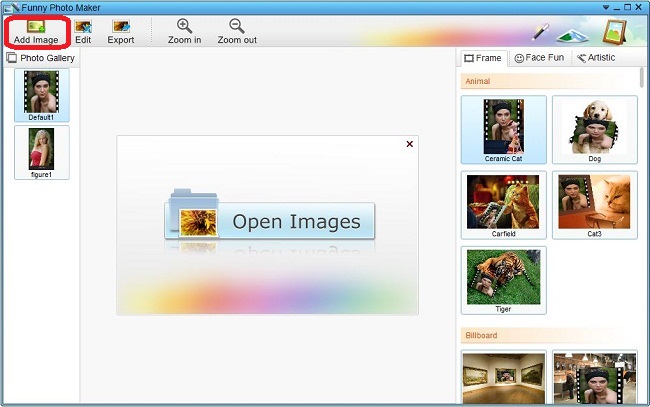
After open the free photo editor Funny Photo Maker, you will see there is an "Add image" button on the top left. You can click this button to add a photo to Funny Photo Maker. Or you can also click the "Open Images" button to add your photo to Funny Photo Maker.
Step 2. Find and add the rain photo effect
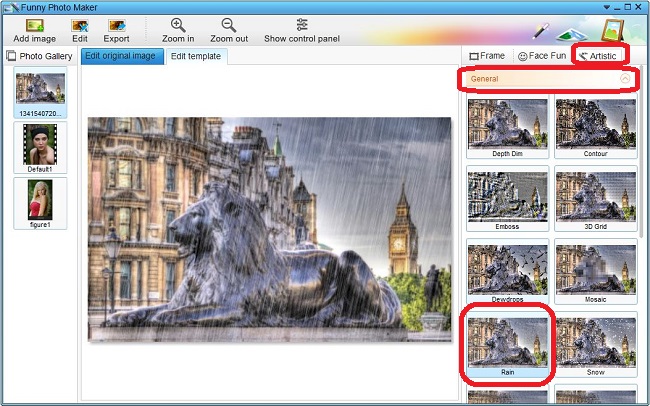
After you add the photo you want to add rain photo effect to, you can see it on the left panel. On the right of the free photo editor, you can see three tabs and some photo thumbnails. The three tabs are the three main categories of the funny photo templates in Funny Photo Maker. They are "Frame", "Face Fun", and "Artistic".
The rain photo effect is in the category of "Artistic", so you need to click the tab "Artistic" to find the rain photo effect. There are many sub-categories in "Artistic", you can hide and unfold the sub-categories by clicking the category names. The rain photo effect is easy to find because it is in the first sub-category, which means you can see the rain photo effect once you click the tab "Artistic".
Step 3. Edit the length and the number of the rain
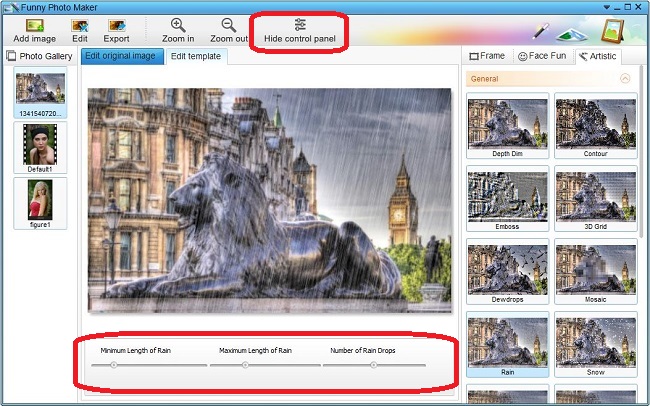
There is a button "Show control panel" on the top of this free photo editor. Click "Show control panel", then the control panel will open beneath the preview window. If you click this button again, you will hide control panel. As the screenshot below shows, you can set the length and numbers of the rain photo effect under the preview window.
Step 4. Export the photo with rain photo effect
With a click on the button "Export", you can start exporting your photos. A new window will open after you click the button "Export". In this new window, you can click the button "Save" to save your photo to your computer, and you can also share you photo to FaceBook, Flickr and Twitter.