How to Add Water Drops to a Photo with Funny Photo Maker
In this Funny Photo Maker Artistic Photo Effects tutorial, we’re going to learn how to add realistic looking water drops to a photo. By adding the artistic photo effects from the famous free photo editor - Funny Photo Maker, your photo will be look like be taken when someone splashed water to your camera. To finish adding the water drop photo effect to your photo, you do not need to learn any photo editing skills or spend any money on photo editing software. There are only two things that you need to prepare: your photo and the free photo editor Funny Photo Maker.
>> Free download the free photo editor Funny Photo Maker
Here’s the photo we’ll be working with in this Funny Photo Maker Artistic Photo Effects tutorial:
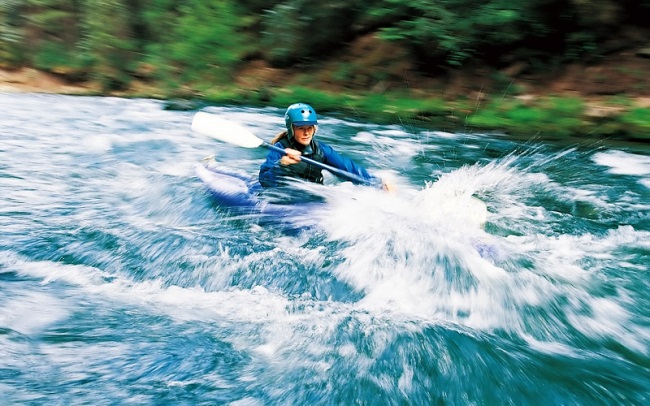
The original photo.
And here’s what it will look like after adding the water drops:
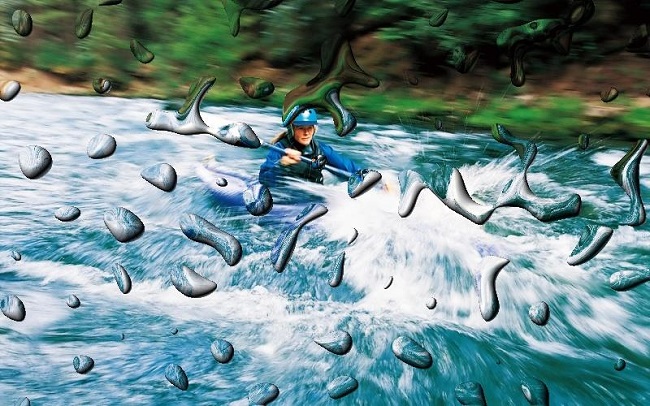
The final photo effect.
Let’s get started!
Step 1. Import your water sports photo to Funny Photo Maker
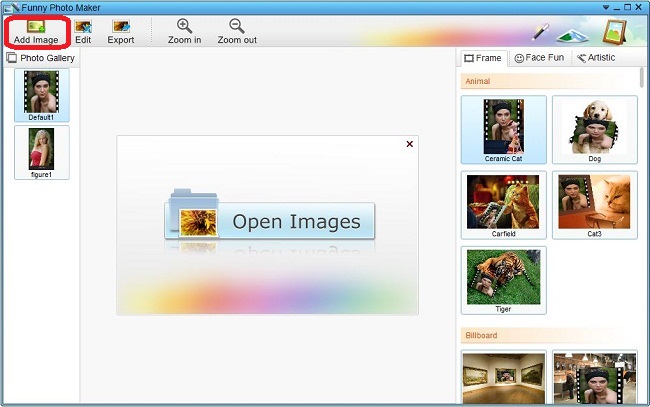
Run Funny Photo Maker, the screenshot below shows the first interface after you open Funny Photo Maker. So from the screenshot below, you can clearly see there is no difficulty to know how to import photos to this free photo editor. You can click the "Open Images" message to add your water sports photo to Funny Photo Maker and you can also click the "Add Image" button to add it. The "Add Image" button is on the top left of this free photo editor, and it is marked with a red box in the screenshot.
Step 2. Add water drops to your photo
Funny Photo Maker provides three kinds of funny photo templates. The first kind of the funny photo template is called Frame. Funny photo templates from Frame can put your photos into various frames, or say, put your photo in a photo. The second kind is called Face Fun. The Face Fun funny photo templates can replace an animal's face, a movie star's face on a poster, or even Mona Lisa's face with your own face from your photo. Adding water drops to a photo is not put your photo in a photo nor replace an animal or a people's face with your face, it belongs to the third kind - Artistic.
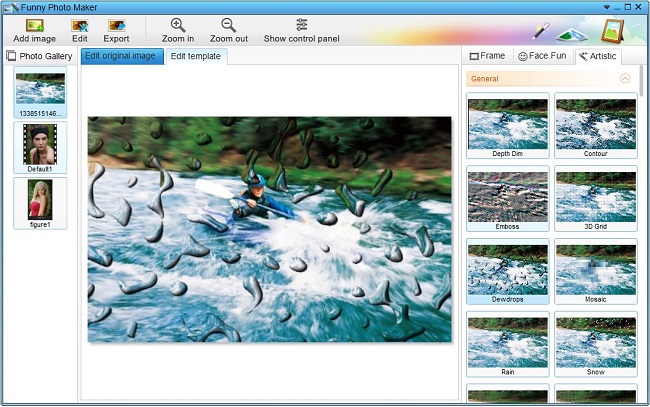
Click the tab "Artistic", you will see the showcase of the whole Artistic photo effect templates. The sixth artistic photo effect template is "Dewdrops". This template is the one that you need to choose. Click this artistic photo effect template; you will see the preview window show the water drops immediately, like the screenshot below.
Step 3. Edit the water drop photo effect
You can edit the water drop photo effect before you export you photo. From the screenshot above, you can see there is a "Show control button" on the top of this free photo editor. Click it, then the settings for editing the water drop photo effect will show up on the button of this free photo editor, and the button name will change to "Hide control panel". The control panel includes the settings for setting mist density, which is the density of the water drops.
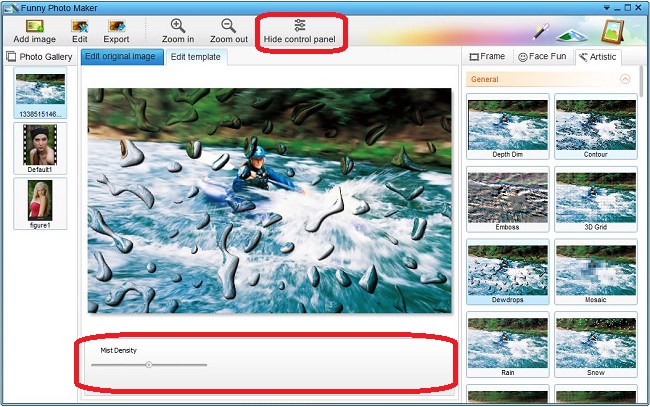
When you think you have set down the water density to the best, you can export your photos to your computer or sharing it on Facebook, Twitter and Flicker. Click the button "Export", then you can start your photo exporting or sharing step.
